In this series of blogs, I will be focusing on deploying SQL Server virtual machines to Azure. Part 1 will cover how to deploy using the Azure Portal, part 2 will focus on using PowerShell and finally part 3 I will use an ARM (Azure Resource Manager) Template. Each of these will create the same server, just showing the different ways it can be done.
Deploying a SQL Server virtual machine is part of Azure’s IaaS (Infrastructure as a Service) offering. Typically in IaaS deployments the configuration and administration is left up to the administrators or IT department.
By deploying SQL Server virtual machine using the Azure Marketplace, Microsoft sets up
- Automated Updates – Azure gives you the ability to configure automated patching times
- Automated Backups – Azure manages the database backups to a storage account
- High Availability – Azure provides Availability Group templates to deploy SQL Server in an High Availability group
Let’s get started
From the Portal Dashboard, click on Create a resource and enter SQL Server 2016 in the search bar and a list of options will come up. For this example, I am selecting the Free License edition.

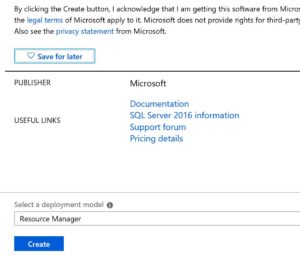
The Legal Terms blade will appear
When ready, click on the Create button.
The Create Virtual Machine Blade will appear to begin entering the information for the server.
You will need to supply a unique server name.
Give it an admin account and password. This account will be added to the Local Administrators Group on the VM. I typically will use this one to initially login into the VM using RDP (Remote Desktop Protocol).
Specify the Resource Group to place the server in. If needed, you have the option to create a new resource group. I am using the existing Resource Group.
Select the location to deploy the VM. I am selecting the North Central location for this server. It is recommended to choose the location closest to the users or location where the server will be accessed from most frequently.
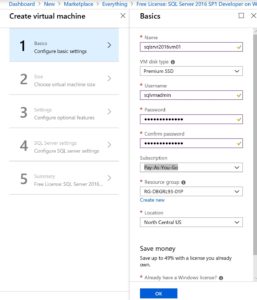
When ready click on OK
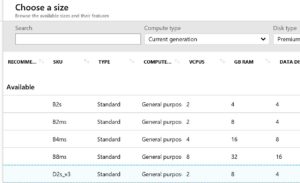
The next blade will ask you to select the size of VM you want to deploy.
In this example I am selecting a D2s_v3, click on Select.
The next blade is for configuring optional settings
High Availability, here you can select an Availability Zone and/or an Availability set. In my example, the Availability Zone is grayed out because the North Central US location is unable to support that. I will not be selecting an Availability Set in this example. For SQL Server to be highly available, we will need to deploy High Availability Groups for SQL Server.
Microsoft has a good article explaining availability sets here stating that “An availability set is a logical grouping of VMs within a datacenter that allows Azure to understand how your application is built to provide for redundancy and availability. ”
Where as an Availability Zone is explained here, where ” Availability Zone is a physically separate zone within an Azure region. There are three Availability Zones per supported Azure region. “
When deploying a SQL Server VM the recommended practice is to Enable the use of Managed Disks. Azure can then manage the best performance settings for the databases on the disks.
You will then need to configure the Network Settings. Organizations may have this setup and you may need to talk to the Network team to get the specifics for your deployment. In this example, I am having Azure create the configuration and accepting the defaults.
- Virtual Network
- Subnet
- Public IP
- Network Security Group (NSG)
- Extensions
- Monitoring
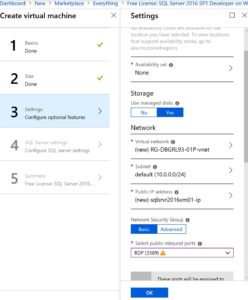
Click on OK when all the information is entered.
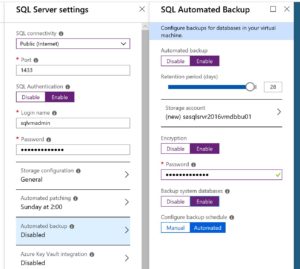
The next blade that comes up is for the SQL Server settings.
SQL Server Port, by default SQL Server uses 1433. This can be changed according to your standards.
SQL Authentication, here is where you can setup the equivalent of an sa account. The SQL Server VMs from the Azure Marketplace disable the sa account. In this example, I am using the same account I created previously in the server configuration blade.
SQL Managed Backups. Here is where we can setup the backups for the SQL Server databases and have Azure manage them. For this, we will need to give it a storage account for the backups. We can also configure the backup retention time frame in addition to manual schedules if needed. With the SQL Managed Backups, there is no need to create separate backup jobs in the SQL Server Agent.
The last blade will ask to verify the configuration.
When ready click on Create to begin the deployment.
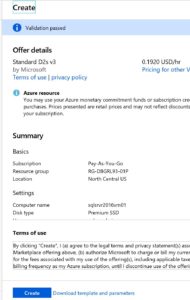
It may take a few minutes to deploy the server. Once it is ready, you can remote into the server and complete your configurations for SQL Server.