Moving on to Terraform seems to be an easy transition after working on some ARM Templates. The Terraform configuration file is a little easier than a JSON file to read and work with. Depending on what you want to deploy you would have a section for each compute resource or back end resource, i.e. storage account, resource group or a virtual machine.
In this article I will walk through a Terraform configuration file to deploy an Azure SQL database in an Azure Resource Group along with a storage account used for setting up a threat detection policy. I am also calling a PowerShell command in the configuration file to setup the long term retention backup policy for the database.
First, setup the Terraform executable. Terraform has a good step by step guide on installing the executable here.
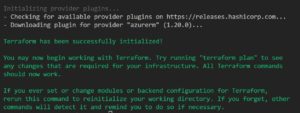
Initialize Terraform
After setting up the Terraform executable in a folder, the first thing to do is to initialize Terraform. At a command prompt or in a terminal window in VS Code, type in Terraform Init and hit enter. Once it is initialized you are ready to begin.

Terraform Provider section
The first section is the provider section, this is where you specify the cloud provider. For this example, I am using the Azure provider. A list of all the providers can be found here. In this section, you also specify the subscription ID and the Tenant ID.
provider "azurerm" {
version="=1.20.0"

subscription_id=""
tenant_id=""
}
Terraform Resources
The majority of the Terraform configuration file will consist of resource blocks. The resource block consists of either the parameters or variables needed to deploy that resource. Below, I will try to point out the resources I am using to deploy the SQL database. Terraform will keep this state of the resource so that it maintains that same configuration through out your development process.
Resource Group
The first resource I have in the configuration file is to deploy a resource group. In this one I am just giving it the name of the resource group along with the location.
resource "azurerm_resource_group" "test2" {
  name     = "RGTFDBGRL93"
  location = "North Central US"
}
Storage Account
Next, I am creating a storage account. This one has a bit more detail to it. Here you can see, I am giving it a name, telling it which resource group to deploy to along with location. Since there are different types of storage accounts, I need to tell it to create a standard storage account.
resource "azurerm_storage_account" "test2sa" {
  name                     = "satfsqldbdiag01"
  resource_group_name      = "${azurerm_resource_group.test2.name}"
  location                 = "North Central US"
  account_tier             = "Standard"
  account_replication_type = "GRS"
}
Logical SQL Server for Azure SQL Database
OK, now that some of the requirements are done. We can get into the heart of creating an Azure SQL Database. One thing about an Azure SQL Database is that it still uses a SQL Server, meaning there is a logical SQL Server instance created when deploying an Azure SQL Database.
In this next section, I point out the details of the SQL Server instance, name, resource group, location, along with the administrator login and password. This login and password would be the equivalent of the sa account and password in a SQL Server instance on premise.
With Terraform there are a few things that can’t be configured in the resource block. For this, I am adding a local-exec provisioner within the SQL Server resource group. The Provisioner section gives me a way to call PowerShell commands to do some of the configuration work I need done to the database.
resource "azurerm_sql_server" "test2" {
  name                         = "sqldbsrvrtf01"
  resource_group_name          = "${azurerm_resource_group.test2.name}"
  location                     = "North Central US"
  version                      = "12.0"
  administrator_login          = "sqldbadmin"
  administrator_login_password = "chang3Me!"

  provisioner "local-exec" {
    command     = "Set-AzureRmSqlServerAuditing -State Enabled -ResourceGroupName ${azurerm_resource_group.test2.name}  -ServerName 'sqldbsrvrtf01' -StorageAccountName ${azurerm_storage_account.test2sa.name}"
    interpreter = ["PowerShell", "-Command"]
  }
}
Server Firewall Rule
Now that the logical SQL Server is set, we can give it the firewall rules.
resource "azurerm_sql_firewall_rule" "test2" {
  name                = "FirewallRule1"
  resource_group_name = "${azurerm_resource_group.test2.name}"
  server_name         = "${azurerm_sql_server.test2.name}"
  start_ip_address    = "10.0.17.62"
  end_ip_address      = "10.0.17.62"
}</code
Azure SQL Database
Now, to the SQL Database. You can see here, the resource blocks are pretty much the same, give it a name, resource group and location.
Notice, at the end of this block, I added a PowerShell command to set the long term backup retention policy for the database. This will give you the ability to set monthly or weekly backup retention plans to fit your needs.
resource "azurerm_sql_database" "test2" {
  name                = "sqldbtf01"
  resource_group_name = "${azurerm_resource_group.test2.name}"
  location            = "North Central US"
  server_name         = "${azurerm_sql_server.test2.name}"

  threat_detection_policy {
    state                      = "Enabled"
    email_addresses            = ["dbgrl93@gmail.com"]
    retention_days             = "30"
    storage_account_access_key = "${azurerm_storage_account.test2sa.primary_access_key}"
    storage_endpoint           = "${azurerm_storage_account.test2sa.primary_blob_endpoint}"
    use_server_default         = "Enabled"
  }

  provisioner "local-exec" {
    command     = "Set-AzureRmSqlDatabaseBackupLongTermRetentionPolicy -ResourceGroupName ${azurerm_resource_group.test2.name}  -ServerName ${azurerm_sql_server.test2.name} -DatabaseName 'sqldbsrvrtf01' -WeeklyRetention P12W -YearlyRetention P5Y -WeekOfYear 16 "
    interpreter = ["PowerShell", "-Command"]
  }
}
Basically, that is all you need. I kept it pretty simple here. Ideally you may want to create some variables and maybe some modules to that the code is a little more reusable and robust. But this is a good start to understanding Terraform.
One of the unique features of Terraform is that it creates a plan, sort of like an execution plan of the resources. When you enter Terraform Plan in the command prompt, it will list out all the resources it will deploy.
When ready, enter Terraform Apply to deploy the resource(s).
That’s about it. It turns out to be a pretty simple process. Next time, I will go over deploying a SQL Server virtual machine in Azure.
Hope this helps!!!